Miracole.com Super Suit Supervisor, Film/TV Costumer, Cosplayer and Uber Nerd
Regime Wonder Woman Armor Build
Let me first start off by saying..
The next time I decide fabricate an intricate armored costume in what amounts to 6 days, all while working 75+ hours a week on a TV show. Kindly roll up a comic of your choosing, and beat me about the head & neck until I come to my senses.
That being said, I am really glad that all the lack of sleep, long hours, burnt fingers, missed social outings and many, many sheets of Worbla (Thank you Yaya), culminated into the end-game that is this costume.
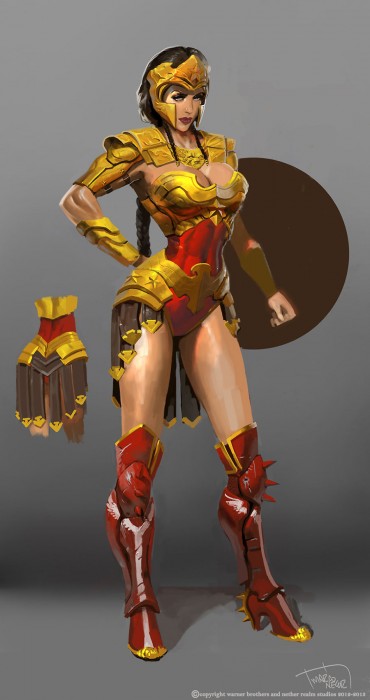
It all started when my Husband came home with a copy of ‘Injustice Gods Among Us’ that featured (unlike most games) multiple female playable characters. I began to really dig some of the designs. But it wasn’t until I came across Marco Nelor’s concept art for Regime Wonder Woman that I was really bit by the inspiration bug.
I had to make this. With no time to sculpt and cast armor the traditional way (in time for DragonCon), Worbla seamed the best option. I’ve heard a lot about it, but I’ve never actually worked with Worbla before. I Googled tutorials, saw how my friends used it and looked up as much as I could, basically working everything out in my head before even cutting my first paper pattern.
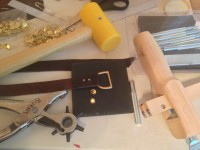
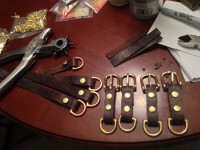
What I used: 4XL Sheets of Worbla (purchased from Yaya Han), quarter hide of leather, XL roll of craft foam, professional grade heat gun (I cannot stress the importance of this tool, it is essential), gloves, various shears/Xacto knives, various rulers, sculpting tools, leather hole punch, leather strip cutter, brass rivets, Star snaps, rivet kit, poundo board, brass buckles, brass D rings, rubber mallet, drafting paper, seran wrap, masking tape, Black & Bronze Krylon spraypaint.
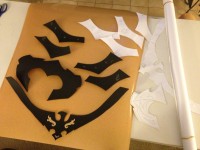
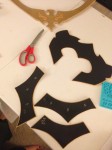
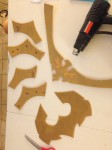
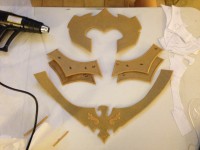
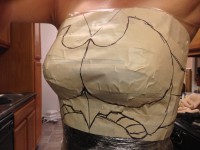
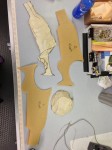
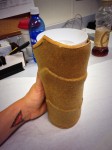
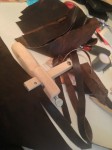
I began with making my patterns. As you can see from some of the pictures, I am a fan of the seran wrap/masking tape method.
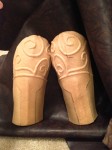
I then transferred the paper patterns over to a large roll of craft foam (Black pieces in the images) and cut all the foam pieces out. Now, it was Worbla time! I started-out thinking one XL sheet would be enough for this costume. Yah, not so much. It took 3-XL sheets to fabricate the costume and sword. Another to do the shield (which is still not done as I type this tutorial). 4-XL SHEETS OF FREAK’N WORBLA! So keep that in mind when trying to estimate how much to order.
Ok, so now that my foam base was cut, I heated up the shiny side of the Worbla and pressed the foam on to it, loosely adhering it to the foam (both sides of the Worbla will stick to each-other, but the shiny side works best). I cut the Worbla, leaving an 8th of an inch lip all the way around the foam piece. I then ‘mirrored’ the piece I cut, making a foam sandwich of sorts. When heating up the front and back of each piece, make sure to start pressing from the center out, this works out any air trapped in-between your foam and Worbla. Air bubbles are bad, expand and will be visible even after the painting process.
Once all air is worked out, pinch together the edges of the Worbla, hitting it with the heat gun as needed. If you do find any bubbles that you might have overlooked after this step, heat up the problem area and pierce the bubble with a small needle. Push the air out and rub over the hole closing it. This will sometimes leave a little dimple, but it’s better than a bubble.
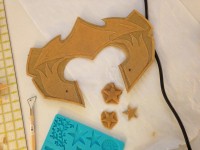
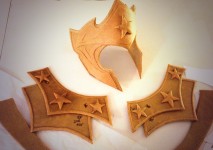
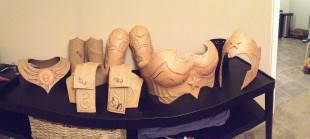
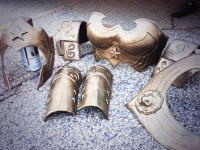
After getting the base shapes done. I began adding more details to to the Crown, Gardbraces, Gorget, Paldron’s and Rarebrace’s. I achieved these details by heating up scrap Worbla to push like molten-hot play-doh into silicone molds (cake molds that I found at Micheal’s Craft store) to make the stars, or hand molding it into swirls, or for the trim, etc. Worbla sticks to itself when hot. So all I had to do was to heat both surfaces and stick them together. It can also be molded over things to achieve a desired shape. For example, the lion on the Gorget was a brass belt buckle I had in my closet. I heated up a small piece of Worbla, hit the buckle with some PAM spray (to keep the Worbla from sticking to the metal buckle), worked the hot Worbla from the center of the buckle to the outside. I let it cool, popped it off the buckle, trimmed the outside and BAM! Awesome Lion head.
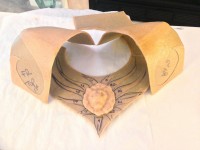
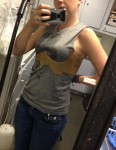
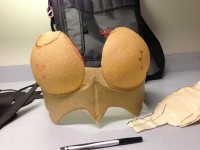
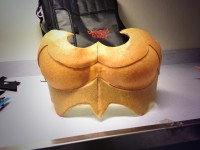
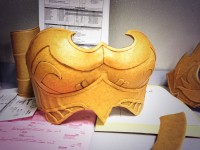
I left the breastplate for last knowing I would learn a lot between my first piece and this very prominent/detailed piece. And I was right to do so. If I started with it, I don’t think it would have come out the way I wanted it to. So I’m glad I left it for last. After using the same seranwrap/ masking tape method, I had my pattern. To achieve the breast shape of the cups, I used the back of a glass wig-head that I had in my closet. Finding something perfectly half-spherical is harder than one might think. I didn’t add a foam core to the cups (it makes the dome shape of the breast almost imposable to achieve), I doubled the thickness of the Worbla by folding it in half while hot to make it more durable. After using the glass wig head to get the shape, I trimmed the disks and began fabricating the base of the breastplate. The base was made in two pieces to better contour with my torso. Like the pieces above, foam is sandwiched between two pieces of Worbla, heated up, air worked out and edges pinched. Then While still hot, I pushed together the pieces, slightly overlapping the front seam, adhering them to each other. Then I molded the pieces around my ribcage to get a rough shape. Once that was cool, it was time to add the cups. I heated the underbust portion of the breastplate base, then the bottom of each of the cups, adhering them at the under-bust seam. From there, it was just adding all the details to make the breastplate look like the picture.
I finished all the pieces with trim and edging. Trim and edge ALL THE THINGS!! Then heat formed everything that needed to be curved using my body (or a coffee mug) as the form.
I skipped the guesso and sanding stage in lieu of a more textured, less shiny & tempered look to the armor. I painted everything using a two step process; starting off with a matte black Krylon fusion for plastics and added a top coat of Krylon bronze- gold (if I have learned anything over the years, it is to not mix brands of spray paint. They sometimes do not play well together and bubble up). Overall I was very pleased with the initial paint job. I plan on antiquing the armor and adding battle damage down the road. But as it was, I was lucky to get this mo-fo finished for the con floor Saturday night!
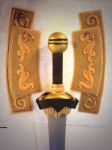
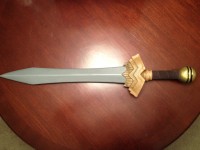
While I was starting leather-mode. Chris was kind enough to take up fabricating Wonder Woman’s Sword. I am SO glad he did, otherwise I would have been weaponless because I ran out of time. The sword base was a quality latex Roman gladius, which will look real, but be con-friendly. He then fabricated a custom hilt.
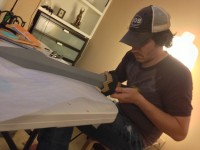
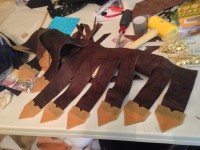
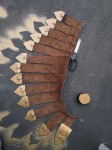
I then turned my attention to the Romanesque tipped war-skirt and all the strapping / buckles needed to actually attach the armor to my person. Because I wanted everything to match perfectly, I bought a half-hide of garment weight leather and over-dyed/tec’d the ever-living-crud out of it. Once happy with the color, I cut the straps of the skirt, tipped each panel and grommeted it into place. I had to paint the tips after attaching them to the skirt due to not knowing if I could paint Worbla, then heat it up & work with it, all while not affecting the color / texture of paint job (I didn’t have time to test this process) . So I made a little reverse stencil to keep the paint off the leather and went about painting the tips in the same 2-step fashion I used for the rest of the armor. Chris took over grommeting the skirt directly to the inside of my belt and hip plates and I moved on to cutting/making leather straps, attaching buckles. We both then attacked attaching the D rings, straps and buckles to every piece that called for them (which to my dismay was just about EVERY piece).
And just when I thought I was almostttt done.. I had to fabricate shin armor, gilded toe caps, spiked heel covers, spiked knee-cap cover, paint on the white ‘Wonder Woman’ style boot stripe, attach it all to thigh-high boots, AND style a wig. Did I mention it was 3pm Saturday by this time. So needless to say, I totally forgot to take pictures of the boot and wig progress. Lets just imagine by Amazonian magic, they fabricated themselves and were delivered by Hermes.
But with a lot of last min ‘Team Burns’ hustle, I made it to the con floor somewhat presentable at around 7pm..
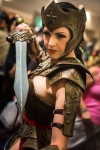
I’m still waiting for photo’s to come back from DragonCon Shoots. But in the meantime, here are some candid floor shots so you can see how the armor turned out. I hope you enjoyed my process, and that may help you with your future armored endeavors!
Photos by: Chris Burns, Michael Ash and Tested.com (In the last Photo I am joined by the lovely Margie Cox)
